top of page

MY BLOG

The season of college graduations have come and passed and now we are into June. Yet I cannot stop looking back at the fond memories I have created with the lovely graduates I took pictures of this past spring. Whether you're a fellow graduate, a friend or family member of one of them [or maybe you're just reading this for fun!], I wanted to highlight all of their galleries here in one place. Here are my favorite photos from each graduate.


Let's begin with my clients the first weekend of April: Katie, Bryn, and Emma.
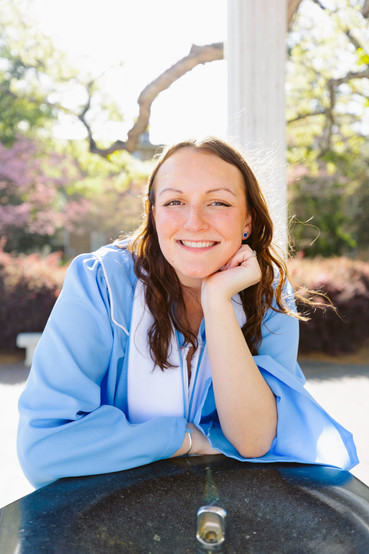


Katie


For Katie, we got to go to Caudill Labs which was my first time shooting there. I love how each graduate does something different for their shoot which makes each shoot something to look forward to! This day was extremely windy, but I remember telling Katie as long as we don't have a Marilyn Monroe moment, it was all good in my books.


Bryn


Bryn was the first of the season to want to shoot on the football field. She was a part of the club basketball team so she wanted to showcase that aspect of her life. It was fun to incorporate the basketball into some shots!


Emma


I remember Emma being very personable and outgoing. We were laughing throughout the shoot, and I had a great time with her and her friend who attended the shoot with her.


Maia


Maia's session was a beautiful sunrise session. This is why sunrise sessions are my absolute favorite! There is almost no one on campus, but the lighting is absolutely gorgeous. It's golden hour but in the morning. We also went to the arboretum as well which was a fun experience to shoot somewhere different.
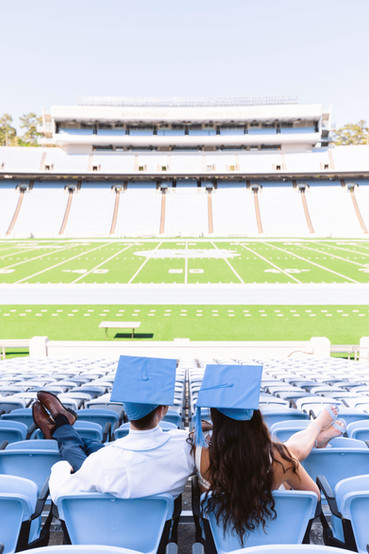
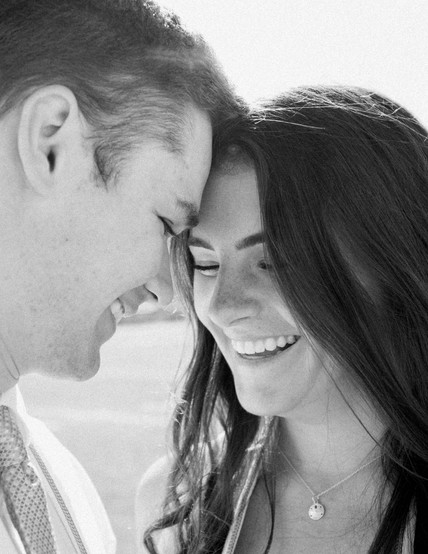


Will and Stephanie


This was a lovely couple's session. It something fun and different as I haven't had the chance to photograph couples in the football stadium before. I especially love how those photos turned out!


Hannah


Hannah was part of the nursing program at UNC so we made sure to include that in her photographs. We also made sure to incorporate lots of other props as well which was fun. I especially love the nursing photos.


Hanna


I actually photographed her older sister when she graduated back in 2022. It's always nice when clients want to book me again! Hanna loves the arboretum so we made sure to showcase that and get a little wet in the creek.


Emily


For Emily's session, I got to photograph at Peabody Hall for the first time. We shot at four locations that day which many of my clients took advantage of when purchasing the deluxe option. That fourth location tends to hardly be the same as the other graduates!


Hailey


I absolutely love how Hailey's photos turned out. Once again, those sunrise sessions are the absolute best! She had a family member that graduated UNC so we also tried to recreate some of those poses as well. I especially love that first shot with Hailey looking over the stadium. It's become one of my all-time favorites!
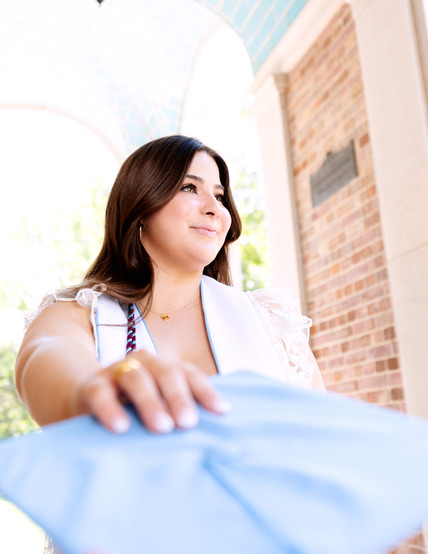


Grace


Grace was a senior marshal, so we made sure to include the special stole that came along with it. Grace has a bubbly personality and was wonderful to work with! I felt like we were friends already.


Viktoria


Viktoria's session was simple and sweet. The classic sessions are always perfect for people who want to be in-and-out with no frills or simply aren't a big fan of big graduation photo sessions. We make it a point to get the essential graduation shots, but not too many extra shots that can take up to two hours of shooting time. This shoot was exactly that and I'm still obsessed with all the photos.
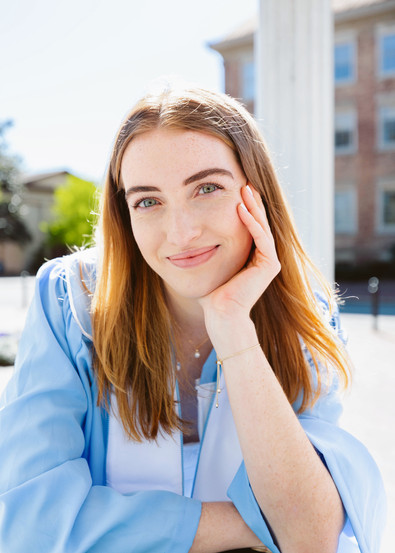
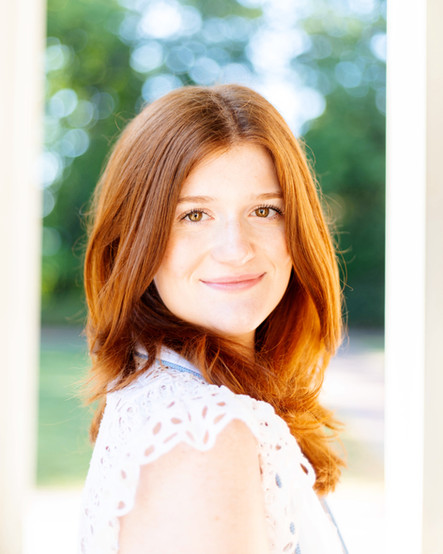


Ellie


Ellie's session was beautiful! She seriously has some gorgeous hair (though I may be biased since I'm a redhead as well). It was nice getting to know her and her mom during this session. I remember we saw a horse on campus for another senior's photos which was the first time I have ever seen that before!


Kellyn


This was my last session of the season! It was a sunrise session (my favorite if you haven't been able to tell already) and it went by so smooth and fast! I had a great time with Kellyn and her mother. I also loved the cute wedges she bought as well for some pictures.


With Kellyn, that brings an end to my spring 2023 grad season. I had such a great time photographing all the different graduates and helping them capture their time at UNC. I hope you enjoyed taking a glance through all the galleries with me.


I had much to reflect on last year when creating my schedules and packages for the 2023 season, and I really loved how this season went. For 2024, it will most likely be almost the same, with hopefully many more sunrise sessions because the lighting is too stunning.


Wherever my graduates go in life, I wish them much success and happiness!


15 views0 comments


The camera lens is more powerful than the human eye. It can pick up on pores, facial hair, dead skin, and more that we may not see in-person. The camera can be sort of unforgiving in that nature. That's why I'm here to help you!


Similar to the idea of stage makeup (but let's not get too crazy with that idea!) more makeup helps accentuates your features and makes your skin photograph nicer on camera.


Having a great foundation routine can really set your photos apart. Since the camera sees more detail than the eye can, it can emphasize any breakouts you might be having. Using a full coverage foundation for photography will help to blur any blemishes or hyperpigmentation that isn't really noticeable in-person, but can be seen from the camera.


Makeup can be tricky to get right for the camera, but with the following routine, you should be glowing in no time! If makeup is intimidating for you and this routine seems overbearing, I encourage you to go one step farther than your normal routine and for a minimum, use full coverage foundation.


Step by Step Make Up Application for Photoshoots:

  1. First, if you have facial hair, I recommend dermaplaning to create a smooth base. Facial hair i.e. peach fuzz can cause the foundation to appear thicker and can show up in photos, especially around the lips and jaw during golden hour or certain harsh lighting conditions. On a fresh, clean, and bare face, apply moisturizer. Let it sit for a minute or two.

  2. Next, apply face primer all over your face. It should match your foundation base in whether it is oil or water-based. I recommend the Pore Professional from Benefit, Lancôme's La Base Pro Makeup and Face Primer (my personal favorite I use), or Too Faced's HangoverRx. Once the primer is applied, let it sit for a minute or two. I've noticed if you apply foundation too quickly after primer or if they don't have the same base (water or oil), sometimes the foundation won't rub in well and will almost "glide" off or "peel" off your face.

  3. Apply liquid undereye concealer, blending it out and patting/rolling in with a wet beauty blender. Ideally, it should be a shade lighter than your foundation shade. Liquid concealer is recommended here because it is a light consistency and buildable. If you use too heavy or thick a concealer it can weigh down your undereyes and emphasize eye bags.

  4. Apply your full-coverage foundation. I like to use my fingers because I believe the warmth in my fingers help blend it in better. Others use beauty blenders or brushes. Use whatever you are comfortable with. Blend well into your neck and hairline.

  5. Cover any problem spots with creamy concealer. A creamy concealer like one that comes in a small pot is recommended because it'll stay in place well over the pimple, etc, without making it cakey. I highly recommend Bo-Ing cream concealer from Benefit. I've used it for years! I personally use a small concealer brush to lightly dab it over imperfections. It's more exact than my fingertip.

  6. Next, use a loose powder to overzealously pat it in on your T-zone and undereyes. Let is sit for a moment before brushing it off. I like this method of "baking" rather than applying powder all over the face. It focuses on powdering the oily areas of the face and leaving the dryer skin alone so your foundation won't look too cakey.

  7. (Optional) Contour as usual. Be careful that you use the right contour for your skin type. Contour is typically more cool toned, meant to create shadows on your face. Be careful that it is not too gray. I use a contour stick from Anastasia, but there are many popular contour sticks and powders out there.

  8. (Optional) If you rather not contour to create a sharper face, stronger cheekbones, or elongate or widen the face, do not feel the need to. If you only want to warm your face, you can use bronzer. Bronzer is applied in roughly the same areas or right above contour but meant to give you more of a sun-kissed look. Some bronzers can end up looking streaky, a little gray, or muddy, so take care in choosing a good warm color.

  9. Apply blush a little more heavy-handed than normal as it will fade on the camera and throughout the shoot. Use your discretion. There are different ways to apply blush to create different effects on your face, but apply it however you would like to.

  10. Prime your eyelids with primer made for eyes. It will help eye makeup from creasing and the colors to show up more vibrantly. Do your eye makeup. Curl your lashes and apply false lashes. I personally do not use full lash strips as it's harder to apply and too thick for my eyes. I prefer the look of single lashes and filling in on the outer lashline where needed. So if full lashes is intimidating for you, that is something to consider.

  11. Fill in your eyebrows so they don't disappear from the camera or harsh light. Fill it in to the natural shape of your eyebrows. You can use eyeshadow that is the same color of eyebrows.

  12. Add highlighter to your cheekbones, the brow bone, and the bridge and tip of the nose.

  13. Put lip gloss or lipstick on. If you decide to put on lipstick, I recommend also using lipliner.

  14. Finally, use setting spray all over your face. My all-time favorite is All-Nighter by Urban Decay. Do not pat dry, let it air dry.


All-in-all, this may seem very intimidating. Just take it one step at a time! There's a few key takeaways you should take from this. (1) Having a good, clean skin base with full coverage foundation is great. (2) Make sure to add color to your face with blush and lip gloss or lipstick. (3) False lashes really make a huge difference! (4) Primer and setting spray will really make sure that your makeup will not budge during your photoshoot.


You can always practice before your shoot to see which makeup look you would like to do. I always recommend on the day of your photoshoot to bring touch ups. This might be your lip gloss or lipstick, some powder or oil blotting sheets.


I wish you the best of luck on your shoot! Have fun and smile for the camera.


19 views0 comments

Updated: Apr 14, 2022

You may think your regular makeup will look great on camera...but in reality most of the time it doesn't.


My rule of thumb is to go one step farther than you normal routine.


You have to wear more makeup than usual for the camera to recognize. The camera isn't able to pick up on such nuances that our human eye can. Otherwise if you do not apply the base correctly, it can make you look like you're wearing no makeup. Or more sickly. Makeup is very tricky to get right for the camera, but with these tips, you should be glowing in front of the camera in no time.


Here are the main key points for any photoshoot:

  • A full-coverage foundation is a must.

  • Add some blush to look alive.

  • False lashes will do wonders in photographs and really bring out your eyes.

  • Lip gloss or lipstick is very important.

  • Primer and setting spray! It helps the makeup stay in place and helps against oil breaking apart the makeup.

  • Apply highlighter on the parts of your face you want the light to hit on and emphasize.


However, if that is too vague-- let me walk you through the whole process on how I do a model's makeup for shoots.

  1. On a fresh, clean, and bare face, apply moisturizer. Let it sit for a minute or two.

  2. Next, apply primer all over your face. Let that sit for a minute or two. I've noticed if you apply foundation too quickly after primer, sometimes the foundation won't rub in well.

  3. Apply liquid undereye concealer, blending it out and patting/rolling in with a wet beauty blender. Liquid concealer is recommended here because it is a light consistency and buildable. If you use too heavy a concealer it can weigh down your undereyes and emphasize eye bags.

  4. Apply your full-coverage foundation. Blend well into your neck and hairline.

  5. Cover any problem spots with cream concealer. A cream concealer is recommended because it'll stay in place well over the pimple, etc, without making it cakey. It's buildable.

  6. Next, use a loose powder to pat it in on your T-zone and undereyes before brushing it off after a few moments. Then powder the whole face.

  7. Contour as usual. Be careful that you use the right bronzer for your skin type. Some bronzers can end up looking streaky, a little gray, or muddy. Along with bronzer use a lighter powder on the highlight spots.

  8. Apply blush a little darker than normal as it will fade on the camera and throughout the shoot. Use your discretion.

  9. Prime your eyelids with primer made for eyes. It will help eye makeup from creasing and the colors to show up more vibrantly.

  10. Fill in your eyebrows so they don't disappear from the camera or harsh light.

  11. Do your eye makeup. Curl your lashes and apply false lashes.

  12. Add highlighter to your cheekbones, the brow bone and the bridge and tip of the nose.

  13. Put lip gloss or lipstick on.

  14. Finally, setting spray.


However, if you are doing an extravagant eye makeup look, I recommend that when doing step 2, also apply primer to your eyes. Then after that go ahead and do your eye makeup. If you do the eye makeup first, you can wipe away any fallout from your makeup without having to start all over again because you messed up your foundation. In addition, tape is a big help in shaping the outer corners of eyeshadow.


For example, you can see how I did my model, Kelly's makeup.


You can see the highlight on her cheekbones lighting up her face nicely. She has false lashes on to help bring out her eyes. Especially with dark eye makeup, it helps prevent your eyelashes from disappearing. Her eyebrows are filled in too. In addition, notice the lip stick and lip gloss combo? Without it, her face wouldn't be evenly balanced.


You can see here that makeup is really important in photoshoots for you to appear more lively.


If you don't know where to start for makeup looks, a good place to start is Pinterest. I use Pinterest for all my inspiration and reference photos. So if you're ever lost on what type of makeup to do, start there! Make sure it matches the photoshoot location and vibe, including your clothes.


As you can see above on Ariel's face, we added pearls around her eyes and down her neck to match the dreamy angel vibes of the shoot. It'd be strange if we did red lipstick with a black smoky eye for this shoot.


It's these minor things you have to think about to make the whole shoot come to life.


I hope these tips were helpful, but if you would like me to film a video of me doing a model's face let me know!

86 views0 comments
bottom of page