
MAKE UP TIPS FOR PHOTOSHOOTS
- Gabrielle Strickland
- Oct 7, 2021
- 3 min read

Updated: Apr 14, 2022
You may think your regular makeup will look great on camera...but in reality most of the time it doesn't.
My rule of thumb is to go one step farther than you normal routine.
You have to wear more makeup than usual for the camera to recognize. The camera isn't able to pick up on such nuances that our human eye can. Otherwise if you do not apply the base correctly, it can make you look like you're wearing no makeup. Or more sickly. Makeup is very tricky to get right for the camera, but with these tips, you should be glowing in front of the camera in no time.
Here are the main key points for any photoshoot:
A full-coverage foundation is a must.
Add some blush to look alive.
False lashes will do wonders in photographs and really bring out your eyes.
Lip gloss or lipstick is very important.
Primer and setting spray! It helps the makeup stay in place and helps against oil breaking apart the makeup.
Apply highlighter on the parts of your face you want the light to hit on and emphasize.
However, if that is too vague-- let me walk you through the whole process on how I do a model's makeup for shoots.
On a fresh, clean, and bare face, apply moisturizer. Let it sit for a minute or two.
Next, apply primer all over your face. Let that sit for a minute or two. I've noticed if you apply foundation too quickly after primer, sometimes the foundation won't rub in well.
Apply liquid undereye concealer, blending it out and patting/rolling in with a wet beauty blender. Liquid concealer is recommended here because it is a light consistency and buildable. If you use too heavy a concealer it can weigh down your undereyes and emphasize eye bags.
Apply your full-coverage foundation. Blend well into your neck and hairline.
Cover any problem spots with cream concealer. A cream concealer is recommended because it'll stay in place well over the pimple, etc, without making it cakey. It's buildable.
Next, use a loose powder to pat it in on your T-zone and undereyes before brushing it off after a few moments. Then powder the whole face.
Contour as usual. Be careful that you use the right bronzer for your skin type. Some bronzers can end up looking streaky, a little gray, or muddy. Along with bronzer use a lighter powder on the highlight spots.
Apply blush a little darker than normal as it will fade on the camera and throughout the shoot. Use your discretion.
Prime your eyelids with primer made for eyes. It will help eye makeup from creasing and the colors to show up more vibrantly.
Fill in your eyebrows so they don't disappear from the camera or harsh light.
Do your eye makeup. Curl your lashes and apply false lashes.
Add highlighter to your cheekbones, the brow bone and the bridge and tip of the nose.
Put lip gloss or lipstick on.
Finally, setting spray.
However, if you are doing an extravagant eye makeup look, I recommend that when doing step 2, also apply primer to your eyes. Then after that go ahead and do your eye makeup. If you do the eye makeup first, you can wipe away any fallout from your makeup without having to start all over again because you messed up your foundation. In addition, tape is a big help in shaping the outer corners of eyeshadow.
For example, you can see how I did my model, Kelly's makeup.
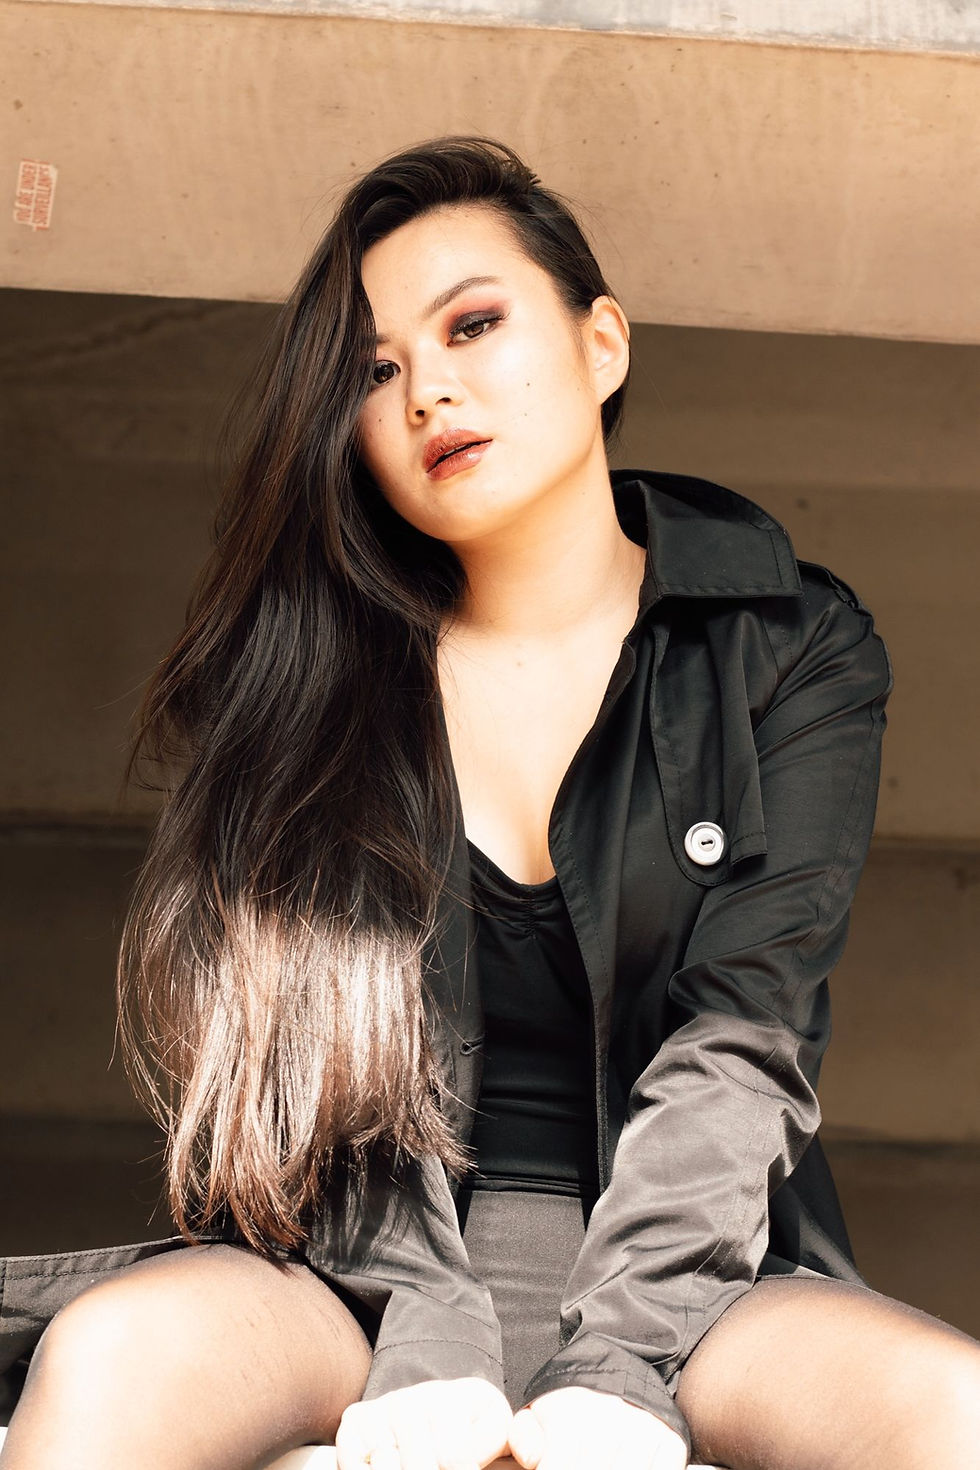
You can see the highlight on her cheekbones lighting up her face nicely. She has false lashes on to help bring out her eyes. Especially with dark eye makeup, it helps prevent your eyelashes from disappearing. Her eyebrows are filled in too. In addition, notice the lip stick and lip gloss combo? Without it, her face wouldn't be evenly balanced.
You can see here that makeup is really important in photoshoots for you to appear more lively.
If you don't know where to start for makeup looks, a good place to start is Pinterest. I use Pinterest for all my inspiration and reference photos. So if you're ever lost on what type of makeup to do, start there! Make sure it matches the photoshoot location and vibe, including your clothes.

As you can see above on Ariel's face, we added pearls around her eyes and down her neck to match the dreamy angel vibes of the shoot. It'd be strange if we did red lipstick with a black smoky eye for this shoot.
It's these minor things you have to think about to make the whole shoot come to life.
I hope these tips were helpful, but if you would like me to film a video of me doing a model's face let me know!


Comments